Got a big load of WAV files that you want to convert to text? Maybe you’re running your own podcast, maybe you’re conducting interviews, or maybe you just want me to get to the point so that you can convert your WAV to text sometime today. Whatever your reason, tl;dv is the answer.
We like to keep things simple. As such, we’ve made a 5-point step-by-step guide that you can follow in minutes to transcribe your WAV files to text. You don’t need to be a rocket scientist. In fact, once you’ve set up an account and transcribed one WAV file, any future ones will simply be selecting the file from your computer. You barely even need to look at the screen.
So get ready: the days of paying a fortune or manually transcribing every WAV file are looooong gone. You’re in the future now.

How to Transcribe WAV to Text
With top-of-the-range AI standing to attention to serve your every need, your WAV files are on a one-way trip to transcription-ville. It’s so painfully simple that you’ll be wondering why you haven’t been transcribing your WAV files to text like this the entire time. This is especially true if you’ve been manually transcribing.
Before we get onto the step-by-step guide, let’s clear up what WAV files are.
What are WAV Files?
WAV is short for ‘Waveform Audio File Format’. It’s an audio file format developed by Microsoft and IBM. Widely used, especially by professionals in audio production, WAV files are an uncompressed audio format that store raw audio data without any loss of quality.
The name, ‘Waveform Audio File Format’, comes from the way the audio is stored. It represents the waveform of an audio signal. This means that WAV files contain a precise representation of the audio’s amplitude over time.
WAV files support various audio characteristics, such as different bit depths (8-bit, 16-bit, 24-bit, or 32-bit) and sample rates (e.g., 44.1 kHz, 48 kHz, or higher). The higher the bit depth and sample rate, the more accurately the WAV file can represent the original audio.
According to Sound Buttons Lab, one advantage of WAV files is their compatibility with a wide range of audio software and devices, including media players, audio editing software, and professional audio equipment. However, due to their uncompressed nature, WAV files tend to be larger in size compared to compressed audio formats like MP3 or AAC. It’s the price you pay for top quality audio.
WAV files are commonly used for tasks such as audio recording, audio mastering, sound design, and archiving. As such, they often need to be transcribed to turn the WAV file to text. They are also the preferred format for professional audio production as they offer a lossless representation of the original audio, allowing for precise editing and manipulation. It’s like a RAW file but for sound instead of images.
In summary, WAV files are uncompressed audio files that provide high-quality and accurate representation of audio waveforms. They are widely used in professional audio production and recording due to their lossless nature and compatibility with various software and devices. Oh, and they can be transcribed to text using tl;dv and the five step method outlined below…
What is tl;dv?
tl;dv is predominantly a meeting recorder. It records, transcribes, and translates video calls in more than 25 languages! Using state-of-the-art AI to simplify and streamline tasks that were once time-sucking nuisances, tl;dv is here to catapult you into the future. A future where you can be more productive and have more free time. Oh, I forgot to mention that tl;dv’s core features are completely and utterly free. Forever.
Not only does tl;dv transcribe audio files like WAV to text, it also can transcribe video files like MP4, MKV and MOV. Edit video transcripts by highlighting a section of the transcript directly. This allows you to create highlights, reels, and clips from videos, or even mash multiple videos together.
You can also add timestamps to your video, tagging friends or colleagues at important moments so they can skip straight to the relevant parts. This is ideal for user researchers who want to share snippets of juicy insights without boring the receiver with the full-length interview. Workers in these disciplines use tl;dv almost daily:
It’s hard to deny that AI is going to dramatically change the landscape of the workplace. It already has in many ways, and as the technology advances and gains more users, that impact is only going to grow. What was once just sci-fi has actually been created and grown into the fastest-growing consumer app in history. Everybody is shedding hours by using AI to do their most time-consuming work for them. ChatGPT’s astronomical rise has allowed a suite of tools to use their plug-ins so you can’t really escape it anymore. It’s here whether you like it or not.
However, tl;dv is one such tool that can save you time converting your WAV files to text. Especially if you were one of the leftovers from the nineteenth century, still manually transcribing your audio files. tl;dv’s industry-leading speaker recognition will ensure you keep track of who’s talking, even during times of rough quality.
Step-by-Step Guide for Transcribing WAV to Text
Finally, the step-by-step guide. There are only five steps. Five simple steps. Once you’ve completed the first two, you’ll never have to do them again. Transcribe your WAV to text by doing the following:
- Create an account with tl;dv
- Choose your language
- Click “Upload video”
- Select your WAV file and wait for it to process
- Receive your transcript and automatic AI summary
Let’s add a few screenshots to the mix so you can follow along.
1. Create an account over at tldv.io.
2. Choose your target language.
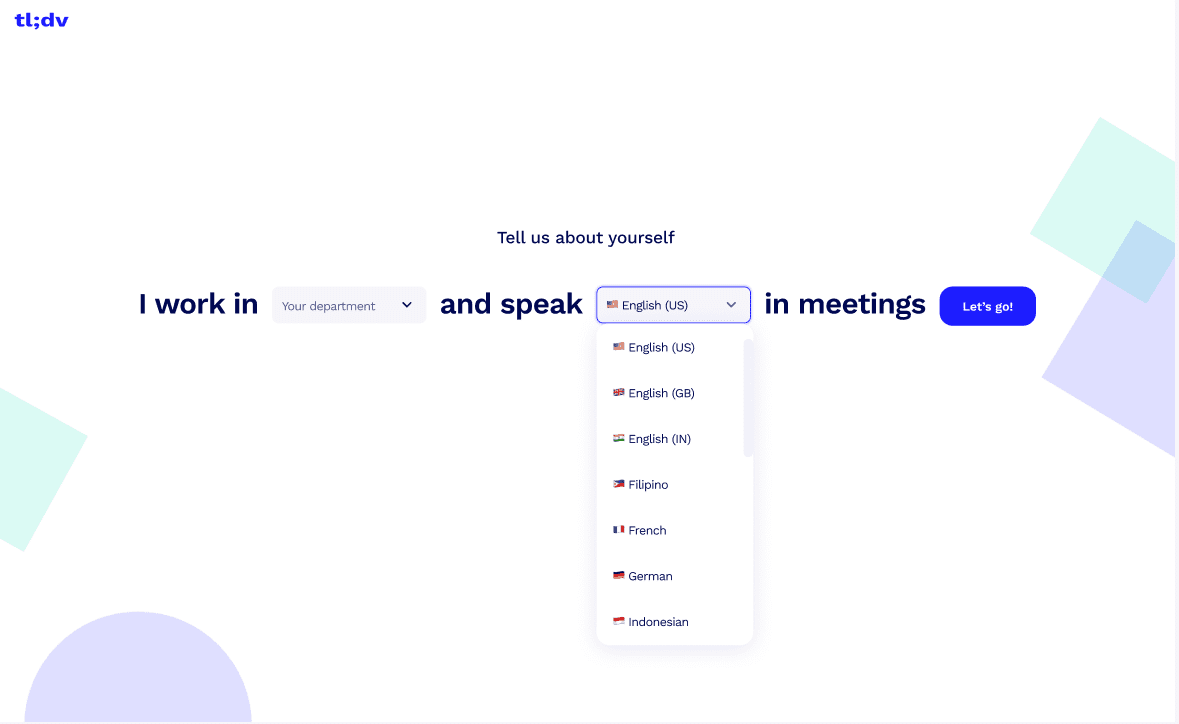
tl;dv offers more than 25 languages to choose from, including:
- English
- German
- Dutch
- Japanese
- Korean
- Spanish
- Portuguese
- Polish
- Italian
- French
3. Click on “Upload video”.
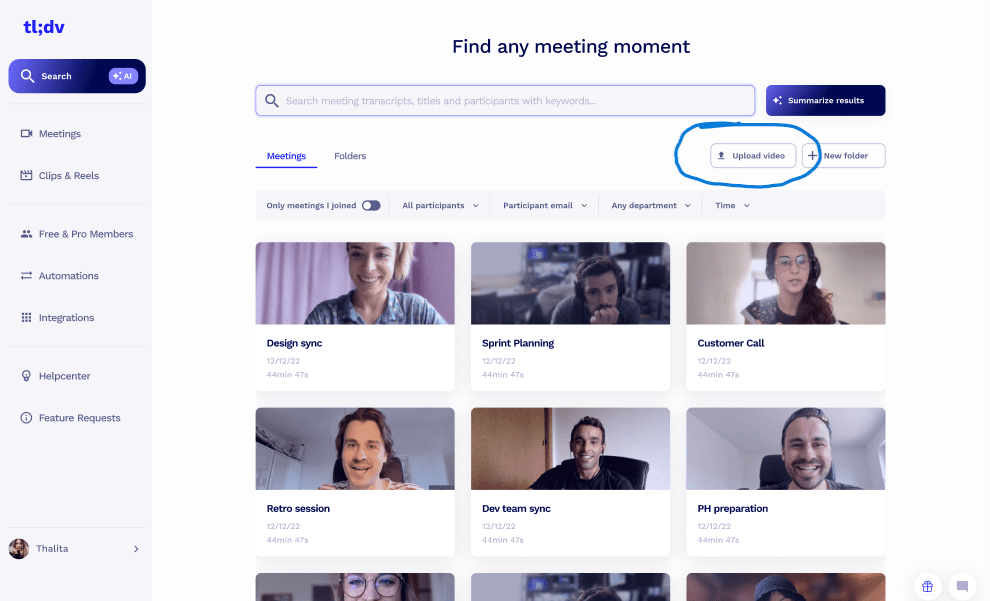
4. Choose the WAV file that you want to transcribe and let it process. It won’t take long.
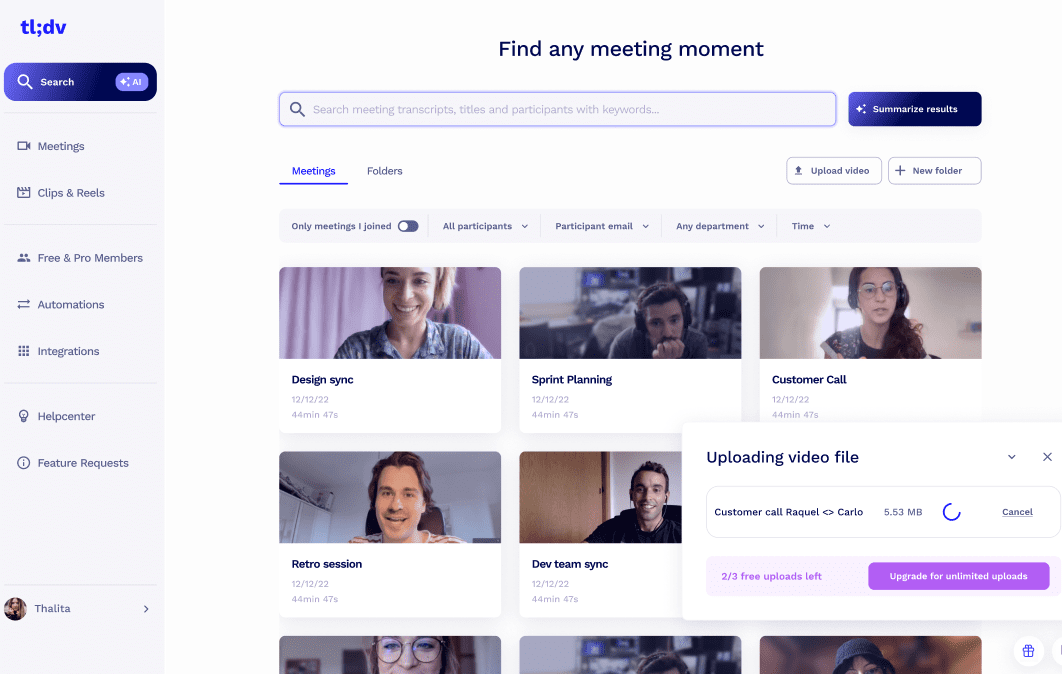
5. Receive a transcript and an automatic AI summary.
We told you it was simple. The whole process takes less than ten minutes. And that’s including the “Create an Account” section. Once that’s done, you’ll be transcribing your WAV files in no time.
Which File Types Does tl;dv Transcribe?
Obviously, tl;dv transcribes WAV to text. However, it also transcribes the following file types:
- MKV
- MP4
- MOV
- MPEG
So you can follow up your WAV file by transcribing an MKV file, or by converting MP4 to text. tl;dv will become your one-stop transcription shop.
Convert Your WAV File to Text Today
tl;dv is the ultimate choice if you’re wanting to convert your WAV to text quickly and easily. Having said that, tl;dv should be your go-to regardless of your file type. It’s 100% free to get started so you’ve got nothing to lose! No subscription necessary, either.
If the reason you’re transcribing WAV files is work related, you might be better off taking a look at tl;dv’s paid plans. With tons of state-of-the-art features, including top integrations (with Salesforce, Hubspot, Notion, Slack and more), tl;dv’s competitive business plan is more than worth checking out.
For now, though, the free plan offers unlimited recording and transcription minutes (during live meetings) as well as top AI services. You can download it for Zoom or Google Meet.


