Skip to content


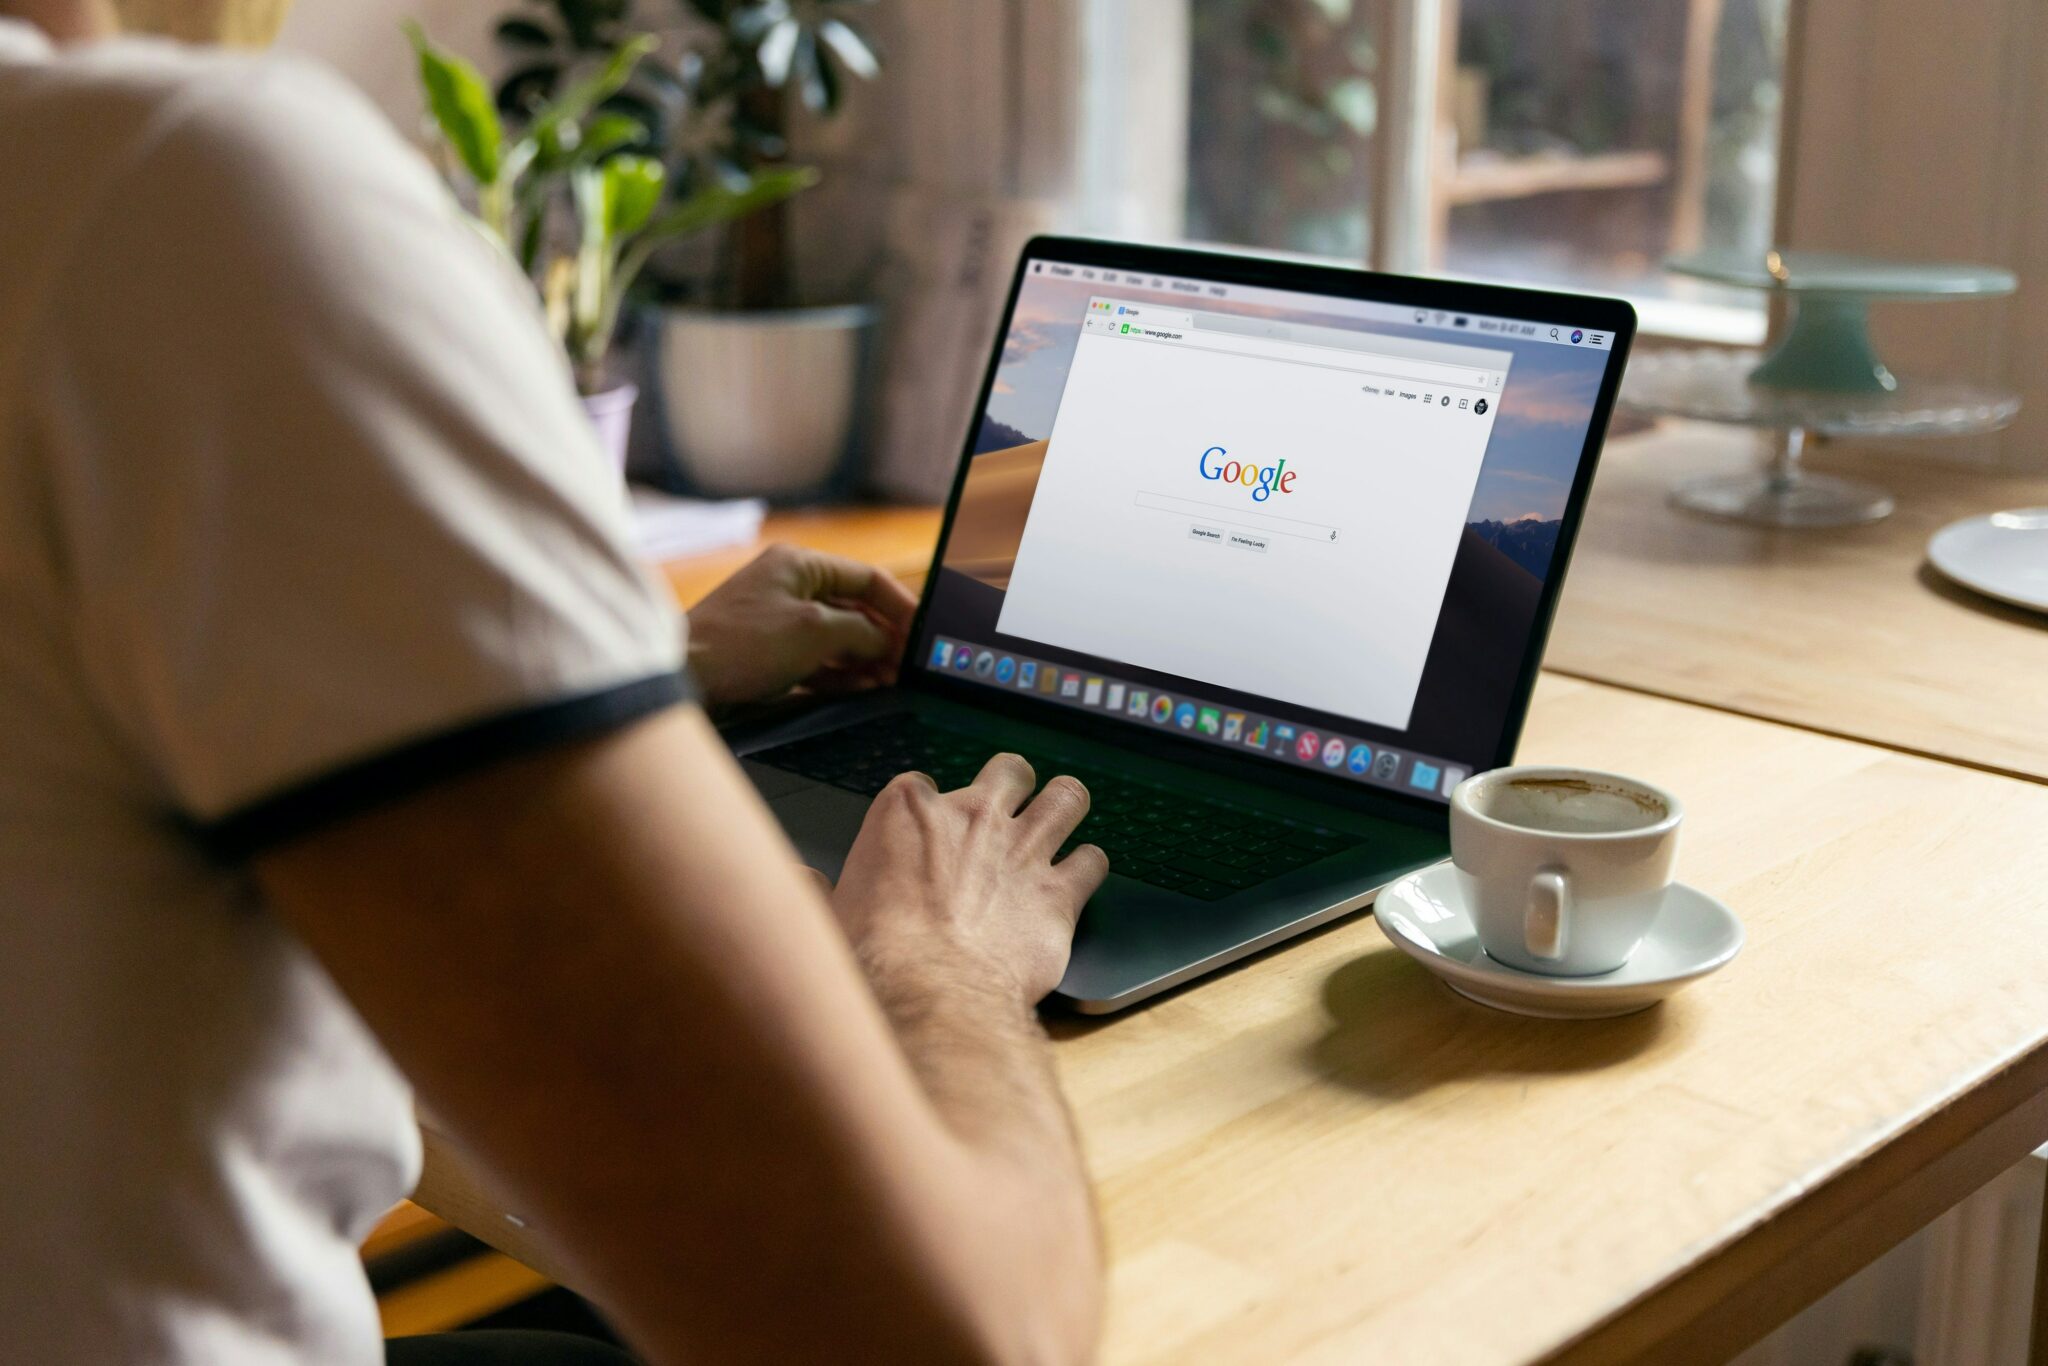

In 2026, you would think we’d all have this figured out by now. We’ve all been there; you join a call, ready to wax lyrical, and suddenly, complete silence. Your lips move, but no sound comes out. Someone types in the chat, “Can’t hear you.” Panic sets in. You frantically check your settings, unplug and replug your headset, and resort to the classic IT fix: turning it off and on again. Meanwhile, your boss, client, or potential employer waits patiently as you fumble with your mic. A simple Google Meet test beforehand could have saved you from this tech nightmare.
Whether you’re hopping on for a virtual interview, leading a big sales pitch, or catching up with your team, taking a few minutes to check your setup ensures a smooth, stress-free call. No scrambling around at the last minute, no awkward delays, just clear and crisp video and audio.
The good news? Testing Google Meet is ridiculously easy. A quick check beforehand can prevent awkward silences, pixelated video, and just looking like an all-round donut. Let’s walk through exactly how to do it. Additionally, exploring google meet features for remote teams can enhance overall collaboration and productivity. By leveraging tools such as screen sharing and breakout rooms, teams can engage more effectively, regardless of their physical locations. Embracing these features not only improves communication but also fosters a stronger sense of connection among team members.
Why You Should Always Test Google Meet Before a Call

Let’s be real – nothing kills the vibe of a virtual meeting faster than the dreaded, ‘Can you hear me now?’ Tech hiccups don’t just waste time; they derail conversations, chip away at credibility, and turn what should be a productive chat into a game of charades. Save yourself (and everyone else) the frustration: test first, talk later!
A pre-call Google Meet test ensures that your microphone, camera, and internet connection are working properly, so you can start on time without delays.
Imagine this: You’re about to hop on a virtual interview for your dream job. You’ve rehearsed your answers, your resume is polished, and your background is the perfect mix of “I’m professional” and “I have a personality.” The interviewer joins, you smile, you go to introduce yourself… and nothing. No sound. Just you, smiling awkwardly like you’re in a silent movie.
Technical issues are a common hurdle in virtual meetings, with 58% of professionals citing software or technical problems as their primary challenge. Implementing a quick pre-call test can significantly reduce these disruptions. Not only do platforms like Google Meet regularly cause problems, but they can dramatically delay your entire organization, damaging productivity all-round.
68% of workers experience that up to 95% of meetings start late! It’s no wonder, most people prefer to skip meetings and catch up later. By dedicating a few minutes to test your microphone, camera, and internet connection before your meeting, you can enhance professionalism and confidence.
It can be the difference between a smooth, confident call and a virtual disaster. And it’s not just about avoiding tech mishaps, it’s about showing up prepared.
When a Google Meet Test Is Essential
Google Meet tests are essential before every call, really. But if you had to boil it down to the most important ones, you’d be looking at:
- Job Interviews. A technical issue at the start of an interview can create unnecessary stress and take time away from your opportunity to showcase your skills.
- Client Meetings & Sales Calls. Clear communication is crucial when building relationships and making a strong impression.
- Team Meetings & Presentations. Whether you’re leading the discussion or simply contributing, being fully heard and seen makes collaboration smoother.
- Webinars & Training Sessions. When presenting to a larger audience, ensuring everything works beforehand prevents disruptions and keeps the focus on your content.
Even small technical issues can affect the flow of a meeting, but they’re easy to prevent with a quick check. Testing Google Meet beforehand allows you to join calls on time, without distractions, and with full confidence in your setup.
Now, let’s go step-by-step through how to test Google Meet before your call.
How to Run a Google Meet Test Call (Step-by-Step Guide)
Testing Google Meet before a call takes just a few minutes, but it can save you from technical hiccups and last-minute scrambling. Follow these steps to ensure your audio, video, and internet connection are working perfectly:
- Open Google Meet
- Use the Green Room to check your audio and video
- Start a test call
- Check internet stability
- Adjust your lighting and background
Let’s dive into each step so you know exactly what to do.
1. Open Google Meet
Before anything else, open Google Meet in your browser. You don’t need an official meeting invite to test your setup, Google Meet provides built-in tools for this. Just follow these steps: Once you’re comfortable with the platform, you can schedule meetings with Google Calendar to keep everything organized. Make sure to set reminders for yourself and participants, so no one misses the meeting. This will help streamline your workflow and enhance communication among team members.
- Sign in to your Google account. If you’re not already logged in, enter your credentials.
- Use a supported browser. Google Meet works best in Chrome, Edge, or Firefox. If you’re using Safari or an outdated browser, some features may not work properly.
- Check for browser updates. An outdated browser can cause compatibility issues, so ensure you’re using the latest version.
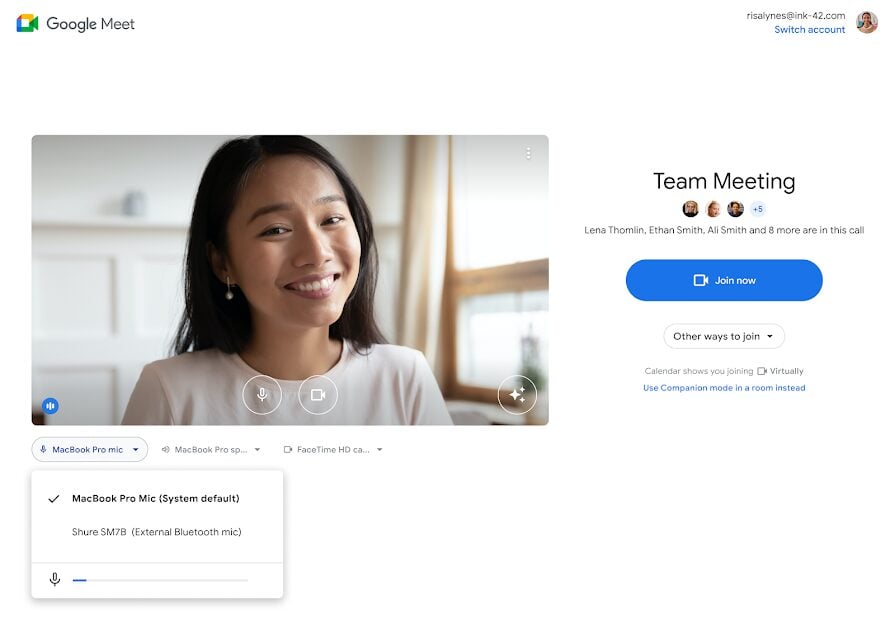
2. Use the Green Room to Check Your Audio & Video
Before joining any meeting, Google Meet provides a preview screen (also called the “Green Room”) where you can check your microphone, camera, and speaker output.
- Click on “Check your audio and video” under your video preview.
- Speak into your microphone. You should see the sound meter move as you talk. If it stays still, your mic may not be working.
- Check your camera feed. If you can see yourself clearly, your camera is working correctly. If it’s black or frozen, you may need to allow camera permissions.
- Play a test sound. Click “Play test sound” to ensure your speakers are producing audio correctly.
Troubleshooting Tips:
- Mic. If your mic isn’t working, click the gear icon (Settings) and check if the correct microphone is selected.
- Camera. If your camera is off, ensure it’s not physically covered or blocked by another app.
- Speakers. If you can’t hear the test sound, check your system volume and make sure your speakers aren’t muted.
3. Start a Test Call (For Full-Scale Testing)
For a real-world test, create a temporary Google Meet link:
- Go to Google Meet. Click “New meeting” and then “Start an instant meeting.”
- Join the call as the only participant. This allows you to check your microphone, camera, and network stability in an actual meeting environment.
- Speak and move on camera. Pay attention to any lag, pixelation, or audio delays. If anything seems off, check your internet connection or adjust your device settings.
Want to test with another person? Copy the invite link and send it to a colleague or friend. They can confirm whether your audio and video are coming through clearly.
4. Check Internet Stability (Avoid Lag & Freezes)
Even if your mic and camera work perfectly, a weak internet connection can cause:
- Choppy video
- Delayed or robotic-sounding audio
- Calls dropping unexpectedly
To check your internet speed:
- Run a speed test. Open speedtest.net and run a quick check.
- Minimum recommended speed: At least 10 Mbps upload and 10 Mbps download speed for smooth video calls.
For ideal conditions, a wired (Ethernet) connection is more stable than Wi-Fi. If you must use Wi-Fi, stay close to your router.
Quick Fixes for Slow Internet
If your internet speed test results in below-par speeds, you’ll need to do something about it before your call. Here are some quick fixes that might help:
- Close unnecessary apps and browser tabs. Background apps can eat up bandwidth.
- Pause downloads or streaming. Large downloads or 4K streaming can slow down your call quality.
- Restart your router. Sometimes, the classic “turn it off and on again” really does work.
- Use an Ethernet cable. A wired connection is far more stable than Wi-Fi, especially for long meetings.
5. Adjust Your Lighting & Background (Optional but Recommended)
If you’re on video, good lighting and a clean background make a huge difference. Follow these steps for optimal conditions:
- Face a light source. Natural light or a desk lamp placed in front of you helps avoid shadows.
- Avoid bright backlighting. Sitting in front of a window? Close the curtains or move your light source to avoid looking like a silhouette.
- Position your camera at eye level. This creates a more natural and engaging appearance.
- Use Google Meet’s background features. You can:
- Blur your background to reduce distractions.
- Choose a virtual background (but test it first as some look better than others).
Final Thoughts: One Quick Test, No Last-Minute Panic
Running a Google Meet test ensures your call starts smoothly, without technical issues or last-minute panicking. In just a few minutes, you can confirm that your microphone, camera, and internet connection are working properly. This helps you:
- Avoid audio issues that make you sound distant or muted.
- Prevent camera mishaps so you appear clear and professional.
- Check your connection to avoid lag or dropped calls.
Pro Tip: Bookmark this guide so you can quickly run through these steps before any important meeting.
Now that your setup is good to go, let’s look at common Google Meet issues and how to fix them.
Common Google Meet Issues & How to Fix Them
Even with a successful Google Meet test, things can sometimes go wrong at the last minute. Technical difficulties are a prevalent challenge in virtual meetings, with 60% of remote workers experiencing such issues, leading to an average of 23 minutes per day spent resolving them! That compounds quickly.
Here’s a troubleshooting guide for the most common issues and how to fix them fast so you can get back to your meeting without delay. We’ll cover problems like:
- No one can hear you (microphone issues)
- You can’t hear others (speaker issues)
- No one can see you (camera issues)
- Poor video or audio quality (lag, freezing, or pixelation)
- Google Meet keeps disconnecting or won’t load
Let’s dive into each one in more depth.
1. No One Can Hear You (Microphone Issues)
If nobody can hear you when you’re talking, it’s bad news. There’s likely something wrong with your microphone, but there are a few easy fixes you can try. Let’s have a look at what could cause microphone issues:
Possible Causes for Microphone Issues
The mic can have all sorts of problems, but sometimes it’s not so serious. Ever tried talking only to find out you’re on mute? It happens more often than you might think. Here are some of the most common causes for disruptions with your microphone:
- Wrong microphone selected in Google Meet settings
- Mic is muted (physically or in the app)
- Browser or system permissions blocking microphone access
- Another app (Zoom, Teams, etc.) using the mic in the background
How to Fix Microphone Issues
To fix your microphone, you can try a few things before entering full panic mode (don’t worry; you never have to enter full panic mode).
- Unmute Yourself. Click the microphone icon in Google Meet to ensure you’re not muted.
- Check Google Meet Settings. Click the three-dot menu (⋮), go to Settings then Audio, and make sure the correct microphone is selected.
- Test Your Mic. Speak and check if the green audio meter moves. If not, continue troubleshooting.
- Check System Permissions. Ensure Google Meet has permission to use your microphone:
- On Windows: Go to Settings then Privacy then Microphone and allow access.
- On Mac: Go to System Settings then Privacy & Security then Microphone and enable it for your browser.
- Restart Your Browser or Device. This closes background apps that might be using the mic and refreshes system settings.
Pro Tip: If you’re using an external microphone, unplug and reconnect it. Sometimes, a simple reconnection does the trick.
2. You Can’t Hear Others (Speaker Issues)
If your meeting is eerily silent, your speakers might not be working. Try these fixes to get the sound back.
Possible Causes for Speaker Issues
There are a few reasons why you might not hear others in Google Meet. From wrong speaker output to muted audio, let’s take a look:
- Wrong speaker output selected. Your computer may be sending audio to the wrong device.
- Headphones or Bluetooth devices connected but not working. If they aren’t outputting sound, Google Meet won’t play through them.
- Browser or system audio muted. Your system volume or browser settings might be silencing Meet.
How to Fix Speaker Issues
Fixing speaker issues is usually fairly simple. Follow these steps to restore your audio:
- Check Google Meet settings. Click the three-dot menu (⋮), go to Settings then Audio, and select the correct output device.
- Play a test sound. If you don’t hear anything, try switching to a different output.
- Ensure system volume isn’t muted. Click the speaker icon in the taskbar (Windows) or menu bar (Mac) and adjust the volume.
- Disconnect Bluetooth headphones. If they’re connected but silent, switch to built-in speakers or reconnect them.
- Restart your browser or device. This refreshes audio settings and fixes many common issues.
Pro Tip: If using external speakers, check their volume, power connection, and any physical mute buttons.
3. No One Can See You (Camera Issues)
If your video feed is black or stuck on a loading screen, your camera might not be working. Let’s fix it.
Possible Causes for Camera Issues
Several things can stop your camera from working in Google Meet. Dodgy permissions settings are often the main culprit, but there are a few other things it could be:
- Camera blocked by another app. Zoom, Teams, or another application might be using your camera in the background.
- Browser permissions disabled. Google Meet may not have permission to access your camera.
- Physical webcam cover or lens issue. A lens cap or built-in shutter could be blocking the feed.
How to Fix Camera Issues
If your camera is having problems, there are always solutions. Try these steps to get your camera working again:
- Close other apps. Quit Zoom, Teams, or any other applications you’re using to free up your camera.
- Check browser permissions.
- In Chrome: Click the camera icon in the address bar and allow access.
- On Windows/Mac: Go to Privacy Settings and enable camera access for your browser.
- Select the correct camera. In Google Meet, go to Settings then Video and choose the right camera.
- Unblock the lens. If using an external webcam, remove any lens cover and ensure it’s enabled.
- Restart your browser or device. A quick reboot can resolve hidden issues.
Pro Tip: Test your camera in another app (like your computer’s built-in Camera app) to see if the issue is with Google Meet or your device.
4. Poor Video or Audio Quality (Lag, Freezing, or Pixelation)
If your video is lagging or your audio sounds like a robot, your connection might be the problem. There are many reasons why this could be happening, from weak internet connection to low camera resolution settings. Let’s take a look:
Possible Causes for Quality Issues
Here are some of the reasons why you might be getting poor video or audio quality:
- Weak internet connection. Slow or unstable internet can cause video and audio lag.
- Too many apps running in the background. Other programs can eat up bandwidth and processing power.
- Low camera resolution settings. If the resolution is too high, it might be overloading your connection.
How to Fix Quality Issues
If you are encountering lag, there are a few things you can do to fix it. Follow these steps to improve your video and audio quality:
- Check your internet speed. Run a speed test. You need at least 10 Mbps upload & download for smooth calls.
- Close unnecessary apps and tabs. Shut down other programs that use bandwidth (like streaming services or downloads).
- Lower video resolution. In Google Meet, go to Settings then Video then Send Resolution and change it to 720p or 360p.
- Switch to a wired connection. If Wi-Fi is unstable, use an Ethernet cable for a more reliable connection.
- Restart your router. Sometimes, resetting your internet fixes lag issues instantly.
Pro Tip: If your video keeps freezing, turn off your camera and switch to audio-only mode.
5. Google Meet Keeps Disconnecting or Won’t Load
If Google Meet keeps dropping your calls or won’t load, your connection or browser might be causing the issue.
Possible Causes for Connection Issues
Connection problems are often due to your internet connection, but it can also be caused by browser cache or cookie issues, not to mention Google Meet itself could be experiencing disruptions. Here’s why you might be getting disconnected:
- Internet connection dropping. An unstable network can cause frequent disconnections.
- Browser cache or cookies causing issues. Stored data might be interfering with Google Meet.
- Google Meet experiencing service disruptions. Sometimes, the issue is on Google’s end and there’s not much you can do but wait. At least when this happens, you’re not alone.
How to Fix Connection Issues
Try these steps to keep Google Meet running smoothly:
- Refresh the page. Press Ctrl + R (Windows) or Cmd + R (Mac) to reload the tab.
- Restart your router. If your Wi-Fi keeps dropping, try reconnecting or switching to another network.
- Clear browser cache & cookies.
- In Chrome, go to Settings then Privacy then Clear Browsing Data and finally Cached images and files.
- Try a different browser. If Google Meet won’t load, test it in Edge, Firefox, or another browser.
- Check Google’s service status. Visit the Google Workspace Status Dashboard to see if Meet is down.
Pro Tip: If you experience frequent disconnects, try using your phone as a mobile hotspot for a more stable connection.
Stay Prepared and Avoid Stress
Technical issues can happen, but most Google Meet problems have quick fixes. A few minutes of pre-call testing and troubleshooting can save you from frustrating interruptions.
- Can’t be heard? Check mic permissions & settings.
- Can’t hear others? Select the right output device.
- Camera not working? Close other apps & allow permissions.
- Laggy or low-quality video? Improve your internet connection & lower video resolution.
- Google Meet won’t load? Refresh, clear cache, or try a different browser.
Bookmark this guide so you can quickly troubleshoot if issues arise before or during a meeting.
Tools & Features to Make Testing Easier
Running a Google Meet test manually is helpful, but why struggle when there are tools designed to make it easier? From built-in Google Meet settings to handy Chrome extensions, these features help you test, troubleshoot, and optimize your setup with minimal effort. One of the latest advancements includes gpt plugins for enhanced meetings, allowing users to personalize their experience further. These plugins can facilitate note-taking, generate agendas, and even summarize discussions in real-time. Embracing such tools can significantly boost productivity and collaboration during virtual meetings.
We’ll cover:
- Google Meet’s Built-in Pre-Call Check
- tl;dv
- Online Mic Test
- Device Checker
1. Google Meet’s Built-in Pre-Call Check
Google Meet has a pre-call check that lets you confirm your microphone, camera, and speakers are working before you jump into a call. This is the quickest and easiest way to test Google Meet. You can also take advantage of the recordings for Google Meet sessions to review important discussions later. These recordings allow participants to revisit key points and ensure nothing important is missed. By leveraging this feature, teams can enhance their collaboration and communication efforts.
How to Use the Pre-Call Check
Using Google’s pre-call check is simple. Just follow these steps:
- Open Google Meet and click “Check your audio and video” before joining a call.
- Speak into your microphone. If the volume meter moves, it’s working.
- Look at your video. Preview your video to make sure you can see yourself clearly.
- Play a test sound. This ensures your speakers are selected correctly.
- Adjust settings as needed. You might need to switch cameras or select a different mic.
2. tl;dv – Record & Review Your Test Calls
If you want to go beyond a basic test and actually review your audio and video performance, tl;dv is a great tool. Ordinarily, it records, transcribes, and summarizes your video calls, but you can also use it to record you briefly to check everything is working smoothly.
What is tl;dv?
tl;dv is a Chrome extension that records and transcribes Google Meet calls. It’s perfect for reviewing test calls, checking audio clarity, and practicing for presentations. You get unlimited recordings and transcriptions on the free plan, so using it for a Google Meet test call is completely free.
However, testing Google Meet is not tl;dv’s true purpose. It’s an AI meeting assistant designed to streamline your workflows by using AI agents for meetings. This means you can get your meeting notes to automatically sync with your CRMs and project management tools. Similarly, you can get sales coaching, multi-meeting intelligence, and a broad range of more advanced business features.
How to Use tl;dv for Testing Google Meet
Running a Google Meet test through tl;dv is simple. Just follow these steps:
- Install tl;dv from the Chrome Web Store.
- Start a private test meeting in Google Meet.
- Click “Record with tl;dv” and run through a test call.
- Watch or listen back to identify any audio or video issues.
- Adjust settings based on what you notice; fix microphone levels, background noise, or awkward camera angles.
Why tl;dv is Useful
tl;dv is super handy as it allows you to identify video or audio clarity issues in advance. You can rewatch your presentations or interview practice runs to get a better idea of where you need to improve and what’s working well. It’s a great tool to adjust your speaking pace before an important call too. This is especially true in the realm of sales where talk-to-listen ratio is important (this can also be tracked on tl;dv’s paid plans).
The great thing about tl;dv though is its ability to automatically sync your meeting notes (that are automatically generated by AI) with your third party tools and work apps. From Notion to Slack, Salesforce to Hubspot, tl;dv automates your workflows like never before.

3. Online Mic Test
You can quickly and easily test your mic using onlinemictest.com. It does exactly what it says on the tin! It’s a free online tool where you can test your mic in seconds.
How to Use the Online Mic Test
To test your mic online, follow the link above and then take these steps:
- Click the “Play” button on the Online Mic Test website.
- Click “Allow” if you see a question in the browser.
- The line should move when you talk into the mic, indicating sound.
4. Device Checker
Another helpful tool can be found at devicechecker.org. This one lets you play sounds to test your speakers, but it can also check the vast majority of your other devices. From your microphone to your mouse click, your keyboard to your webcam, and everything in between, this is a great resource to make sure all your devices are ready to go.
How to Use Device Checker
To use Device Checker, you can visit their website and select the device you want to check. If we take sound quality as an example, it’ll give you three options: left speaker, right speaker, and both simultaneously. This lets you get an idea of how both speakers are functioning.
Follow these steps to get started:
- Go on the Device Checker website. Follow the link above to get to their homepage.
- Select the device you want to check. There are dozens of devices to choose from. Select the one you want to test.
- Follow the instructions. A new page will open with instructions on how to test the device in question. Click “Allow” for any pop-ups to ensure the website has access to your devices.
Final Checklist Before Your Google Meet Call
Alright, you’re almost there! Before you hit “Join”, run through this quick checklist to avoid any embarrassing “Can you hear me now?” moments:
- Mic and camera
- Background and lighting
- Internet
- Notifications
- Meeting link and files
Let’s take a look at each one in a little more detail…
Mic and Camera: Tested & Ready
Before any call, you should always make sure your mic and camera are ready. Follow these simple steps to ensure everything is in top condition:
- Open Google Meet’s Green Room to check your mic, camera, and speakers.
- Using an external mic or webcam? Make sure they’re properly plugged in and selected in settings.
- Do a quick “Hey, can you hear me?” test. Talk and check for the green audio bar moving.
Background & Lighting: Presentable, Not a Horror Movie Set
You want to look presentable during professional calls. Make sure your background and lighting are set up nicely so you don’t have to worry about them in the frantic moments before the call starts.
- Make sure your background is clean (or at least strategically messy).
- Good lighting = good visibility. Avoid backlighting (no one wants to talk to a silhouette).
- If all else fails, use Meet’s background blur or virtual backgrounds to hide the chaos. For virtual networking events, you can use Uniqode’s digital business card as your virtual background.
Internet: Fast & Stable
Before joining any important calls, you’ll want to make sure your internet is up to scratch. If you’ve been using it prior to the call, this one might not need a thorough check, but it’s still better to be safe than sorry.
- Run a quick speed test (10 Mbps+ recommended for smooth video calls).
- Wi-Fi acting up? Move closer to your router or switch to a wired connection.
- If your internet is really struggling, have a backup plan (like a mobile hotspot).
Notifications: Muted & Distractions Minimized
Before entering a call, make sure your phone is muted and you aren’t going to receive any noisy notifications. You don’t want to draw attention to yourself for the wrong reasons.
- Silence phone alerts, desktop notifications, and chat pop-ups (no surprise messages mid-call).
- Close unnecessary tabs and apps, especially bandwidth hogs like streaming services.
- If you’re working from home, warn your household: “I’m in a meeting, don’t barge in.”
Meeting Link & Files: Ready to Go
You might have all your devices working perfectly, the internet is running without a hitch, and you’re all ready to join. Suddenly, you remember: the meeting link! It’s easy to forget to store it somewhere accessible, and it can lead to even longer delays than faulty equipment. To prevent this, follow these steps:
- Double-check you have the right Google Meet link (no one wants to crash the wrong meeting).
- Open any documents, slides, or notes you’ll need for quick access.
- Planning to share your screen? Test it beforehand; make sure the right tabs are open, and hide anything embarrassing.
Be Early!
Join a few minutes before the call starts to troubleshoot any last-minute tech issues. You’ll look professional, prepared, and not like someone frantically plugging in cables at the last second.
Now go crush that meeting!
A Few Minutes of Testing for a Flawless Call
A quick Google Meet test before your call can make all the difference. By taking just a few minutes to check your mic, camera, internet, and setup, you can avoid last-minute tech issues, feel more confident, and ensure a smooth, professional experience.
Making pre-call testing a habit means fewer surprises and more focus on what actually matters: your meeting. Whether it’s an important interview, sales pitch, or a simple team check-in, a quick test keeps you prepared and stress-free. Using Zoom? Check out our guide on how to test Zoom calls instead.
Try these steps before your next Google Meet and see the difference! Bookmark this page to come back if and when you have technical difficulties! They’ll be solved in a flash.
FAQs About Google Meet Tests
How do I test my mic, camera, and speakers before a Google Meet call?
Before joining a meeting, Google Meet’s Green Room lets you check your mic, camera, and speakers. Just click “Check your audio and video” before entering the call.
You can also go to Settings and then Audio/Video to select and test different devices.
Why is my microphone not working in Google Meet?
If no one can hear you, try these quick fixes:
- Unmute yourself (it happens to the best of us).
- Check Google Meet settings to make sure the correct mic is selected.
- Give mic permissions in your browser and system settings.
- Restart your browser or device. Sometimes, background apps (like Zoom or Teams) hog the mic.
How can I check my internet speed for Google Meet?
Use a speed test tool like Speedtest.net or Google’s built-in “Run Speed Test” feature. You need at least 10 Mbps upload & download speed for uninterrupted video calls. If your connection is unstable, move closer to the router or use a wired connection.
Why is my video blurry or lagging in Google Meet?
A poor connection or high CPU usage can cause video issues. Try these fixes:
- Lower the video resolution in Settings then Video then Send Resolution (switch to 720p or 360p).
- Close unnecessary tabs and apps that may be using bandwidth.
- Switch to a wired connection for a more stable signal.
- Restart your router if your Wi-Fi is acting up.
How do I make sure screen sharing works before a meeting?
To test screen sharing:
- Open Google Meet, click “Present now”, and select your screen, a window, or a tab.
- Ensure your browser has screen sharing permissions in system settings (especially on Mac).
- Close any personal or embarrassing tabs before sharing your screen!
How do I fix echo or background noise in Google Meet?
To get rid of background noise, you can use one of the following methods:
- Use headphones to prevent speaker feedback.
- Enable noise cancellation in Settings → Audio (Meet has built-in AI noise reduction).
- Mute yourself when not speaking to reduce background noise.
What should I do if Google Meet won’t load or keeps disconnecting?
If Google Meet is playing up, you can try the following solutions:
- Refresh the page (Ctrl + R / Cmd + R).
- Restart your router or switch to a different network.
- Clear your browser cache & cookies (Settings then Privacy then Clear Browsing Data).
- Try a different browser. Meet works best in Chrome, but Edge or Firefox can be good alternatives.
- Check Google’s service status at Google Workspace Status Dashboard.